
30 Sept 2010
Turnips

Unfortunately, they're not very popular here: we tried them boiled and roasted, but they still didn't justify their place in the garden.
Yet, before now, I've bought a pound of small ones and eaten them like apples, and enjoyed them. But the ones we've grown now have a bit too much of that radish heat about them.
All's not lost, though. It happened that a duck left six ducklings behind (story here), and they have enjoyed the turnips, the tops particularly.
I think my urge to eat them like apples and to grow them was probably romantic. For many years now I have enjoyed the novels of Erskine Caldwell (the cheap-looking paperbacks you used to see on second-hand bookstalls).

A hungry Jeeter is trying to con a visitor to the house out of his sack of turnips:
"I got a powerful gnawing in my belly for turnips. I reckon I like winter turnips just about as bad as a nigger likes watermelons. I can't see no difference between the two ways. Turnips is about the best eating I know about."(Anyone feeling that Caldwell's use of the word 'nigger' is derogatory should understand that he uses the speech of the people of that day. Caldwell himself was against discrimination and denigration of all poor, black and white, and many Southerners reviled him for his brutal exposés of their region.
Caldwell's biographer
29 Sept 2010
Fruit leather

This year, instead of simply drying the damsons as we did last year (see here), we made fruit leather - from damsons and from various combinations.
To make fruit leather, remove all stones, peel and core apples, then put the fruit into a blender and blend until it's as fine as you want it. Pour out onto an oven tray covered with clingfilm a 1/8" to 1/4" layer of the fruit pulp. (Be sure that all stones are removed. If you leave one it will be chopped in the blender into hard, sharp little pieces.)
Place in an oven on very low, about plate-warming temperature, and leave for 24 hours. Peel the drying pulp off the clingfilm and turn it over. Leave for another 12 hours.
Roll it up in the clingfilm and store in the fridge or freezer -

Varying the ingredients -


There's more info on fruit leathers and a table of the suitability of various fruits here.
28 Sept 2010
Garlic in goose fat

This is simply peeled garlic cloves simmered until soft in goose fat.
The cooked cloves are taken out of the fat and placed in a jar, with goose fat added to cover them.
Great winter food, spread on toast, with a sprinkle of salt.
19 Sept 2010

3 Sept 2010
Making an earth oven. Part 3
Lime plaster finish

 At last, some sunny weather and a chance to put the lime plaster finish on the oven.
As mentioned in the previous section, lime plaster is the preferred finish to the oven, because it breathes. We searched the internet for information on lime plaster mixes and ended with too much data and too many formulae.
Many different mixes are given, from 1:2, lime to sand, to 1:9. There are accounts of the Romans and their addition of 'pozzolan' to produce a lime mortar mix which has lasted 2,000 years. Pozzolan is volcanic ash. Apparently, brick dust will do a similar job, and cement will too. I read of the addition of chopped hair, animal hair, human hair is too fine, to the lime plaster mix, and of chopped straw.

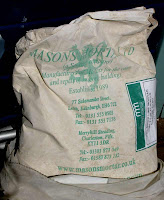 In the end we made our own mix, starting with a bag of lime mortar dry ready-mix of 1 to 2.1/2, lime to sand, bought online from Masons Mortar. We added about another 1.1/2 of coarse sand; about 1/8th of wood ash, the same of chopped straw, and of cement. This mix was put on about 1" thick.
Why lime?
Making an earth oven. Part 1
Making an earth oven. Part 2
See all Parts.


As mentioned in the previous section, lime plaster is the preferred finish to the oven, because it breathes. We searched the internet for information on lime plaster mixes and ended with too much data and too many formulae.
Many different mixes are given, from 1:2, lime to sand, to 1:9. There are accounts of the Romans and their addition of 'pozzolan' to produce a lime mortar mix which has lasted 2,000 years. Pozzolan is volcanic ash. Apparently, brick dust will do a similar job, and cement will too. I read of the addition of chopped hair, animal hair, human hair is too fine, to the lime plaster mix, and of chopped straw.


Why lime?
from The Lime Plastering Company's site:
Lime delivers its hardness and its waterproofing qualities through a process called carbonation. The raw lime mortar sits wet on the wall for several days while it absorbs carbon from the abundant atmospheric CO2 and the curing process begins from the outside inwards. In three or four days the outer surface will be hard to the touch and in ten you will need a chisel to scratch it. Over the next weeks and months the lime will gradually continue this bonding and binding process to form a tough water repellent surface, converting this atmospheric carbon to seal to a fine, flexible finish of ninety-five percent pure calcium carbonate and in the process it will have removed a good portion of CO2 from the surroundings. The longer this process continues, the harder and deeper the set becomes, reaching a micro-porous finish that permits the outflow of moisture by evaporation from within the walls, while preventing the larger molecules of liquid rain from penetrating the structure.
As the lime cures and maybe in later years also, you may find, under close inspection, that tiny cracks have appeared in your lime mortar or render, but these cracks belong to the life cycle of a lime build and though you may not immediately see it, the carbonation process is continuing, for wherever 'new' lime is exposed, ie; in weather cracks or other damage, the lime simply takes in more CO2 from the air around and seals the wound by exactly the same process through which it set hard in the first place.
Making an earth oven. Part 1
Making an earth oven. Part 2
See all Parts.
28 Aug 2010

27 Aug 2010
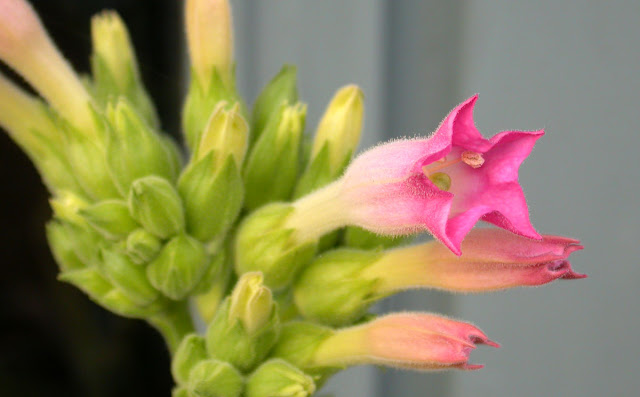
Growing tobacco
We've experimented with growing tobacco over the last three years, and had good success with growing and drying. However, we haven't yet found a device or cutter that will make it possible to cut very finely for cigarettes, like commercial hand-rolling tobacco. Nonetheless, this is a lovely plant to grow.
The seeds require warmth to germinate, but tobacco grows well in the UK.
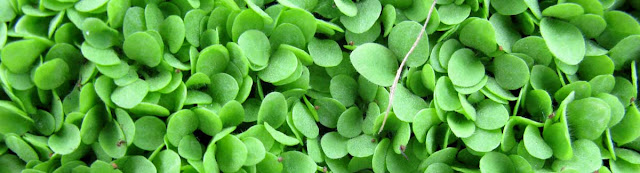 Tobacco seeds and seedlings are tiny.

 They grow fast.
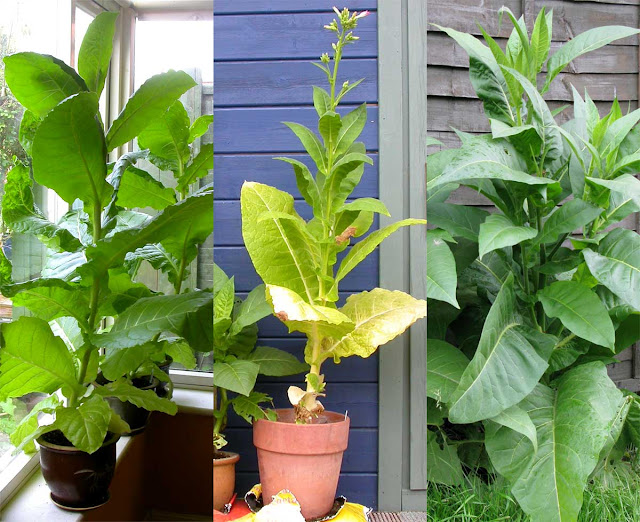 Grow in pots, inside or outside; or grow outside in the ground.
Beautiful flowers

Beautiful roots

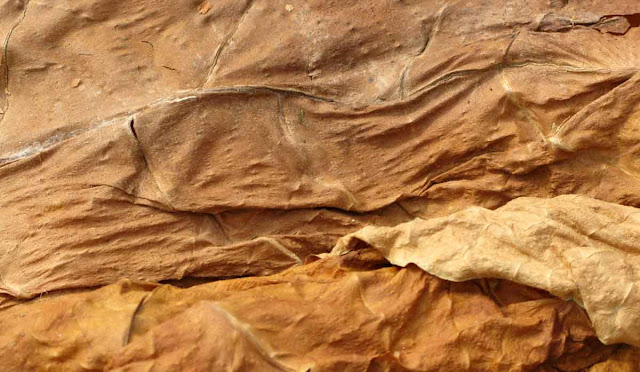
Beautiful leaves

 Pressing and cutting
We read of and tried a method used by sailors, who used to wrap rope or twine around rolls of tobacco leaves to allow them to mature under compression. They cut slices from the end to smoke, rubbing the slices to open out the strands. This came to be called 'navy cut' tobacco.
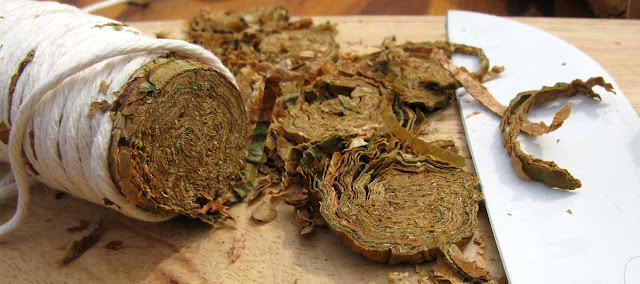 Navy cut.
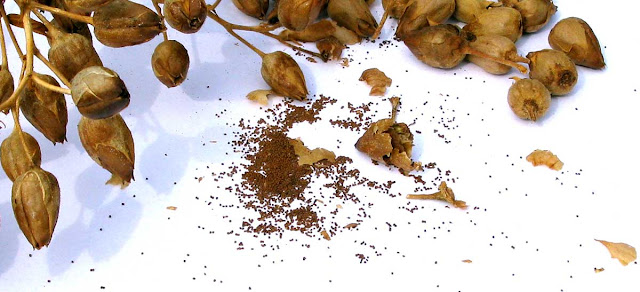
![]() The two on the left are commercial cigarette rolling tobaccos. The one on the right is ours. It's OK for a pipe or cigar filler, but it needs to be much finer for cigarettes.
The two on the left are commercial cigarette rolling tobaccos. The one on the right is ours. It's OK for a pipe or cigar filler, but it needs to be much finer for cigarettes.
Buying seeds
We bought our tobacco seeds over the internet from Plantation House. We bought Maryland 609, Virginia and Monte Calme Yellow seeds; all suitably light for cigarette tobacco. There is a great deal of information on their site, as well as a forum of growers.
The law
The position with growing and using tobacco in the UK seems to be that if it's for personal use, no one's going to trouble you.
This is from a letter sent by Customs & Excise to Plantation House in October 2001:
Additive-free tobacco
 A major consideration with growing your own tobacco is that it can be organically grown and additive-free.
In 2006, Gallaher listed on their site 366 additives to their cigarette tobacco. However, later that year they were taken over by Japan Tobacco, who don't list the info on their site (they state that that section of the website is currently under construction - at 22/04/09).
[Update 21st July 2011: The Japan Tobacco site now shows the ingredients added to tobacco. The info for the UK is here.]
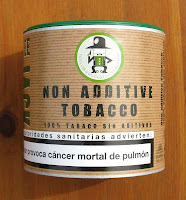 If you are not growing your own and you want to smoke tobacco without additives, you can buy Free Jack Non-Additive Tobacco (that's 'non-additive', not 'non-addiCtive'). This one is sold in Spain, but a Dutch company makes it, so it's likely available elsewhere too. Unfortunately, it says very little on the tin, except for mandatory large health warnings, so there are no exotic-sounding names of tobacco varieties in the blend or of far-away places where it was grown.
(A bit of a disappointment. Old Holborn proudly states on its packet: "It takes 25 varieties of premium grade tobacco, harvested from four continents, then cured gently and allowed to reach maturity, to produce the unique, full taste of Old Holborn Original." A much richer description; though it, too, is a Japan Tobacco brand, and there's likely more than tobacco in it.)
The seeds require warmth to germinate, but tobacco grows well in the UK.


Beautiful flowers


Beautiful roots

Beautiful leaves


We read of and tried a method used by sailors, who used to wrap rope or twine around rolls of tobacco leaves to allow them to mature under compression. They cut slices from the end to smoke, rubbing the slices to open out the strands. This came to be called 'navy cut' tobacco.


Buying seeds
We bought our tobacco seeds over the internet from Plantation House. We bought Maryland 609, Virginia and Monte Calme Yellow seeds; all suitably light for cigarette tobacco. There is a great deal of information on their site, as well as a forum of growers.
The law
The position with growing and using tobacco in the UK seems to be that if it's for personal use, no one's going to trouble you.
This is from a letter sent by Customs & Excise to Plantation House in October 2001:
There is not a great deal of home-grown tobacco smoked in the UK and we will certainly not be targeting potential domestic tobacco producers. Nor do we wish to devote a disproportionate amount of resource to the control of hobby growers and manufacturers.
You may wish to point out to your customers that duty only becomes due once the tobacco can be smoked, i.e. when the cured tobacco leaves have been shredded. There is no duty on tobacco seeds, which are quite legal to buy, or on the tobacco plants themselves.
Additive-free tobacco

In 2006, Gallaher listed on their site 366 additives to their cigarette tobacco. However, later that year they were taken over by Japan Tobacco, who don't list the info on their site (they state that that section of the website is currently under construction - at 22/04/09).
[Update 21st July 2011: The Japan Tobacco site now shows the ingredients added to tobacco. The info for the UK is here.]

(A bit of a disappointment. Old Holborn proudly states on its packet: "It takes 25 varieties of premium grade tobacco, harvested from four continents, then cured gently and allowed to reach maturity, to produce the unique, full taste of Old Holborn Original." A much richer description; though it, too, is a Japan Tobacco brand, and there's likely more than tobacco in it.)
24 Aug 2010
Ladybirds


23 Aug 2010
Making an earth oven. Part 2
Having finished the base, we made a door by glueing, dowelling and screwing together some lengths of thick wood that we had to hand. We used the door as the former for the tapered oven opening, with a smaller hardboard shape for the inside of the opening; then we built the arch of firebricks around these, using fireproof cement.
 The wood used for the door. Four pieces glued and dowelled together.
 The finished door.
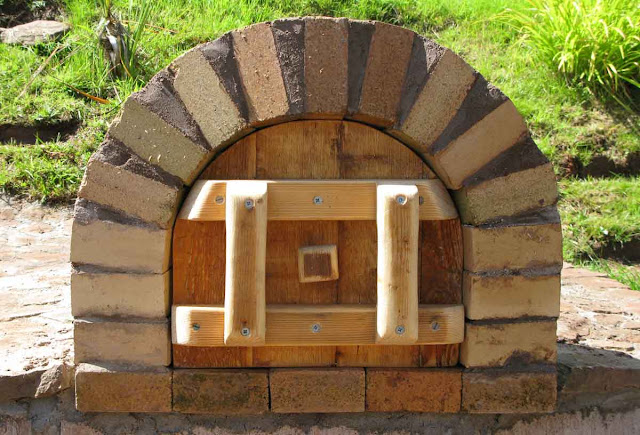 Arch built around door.
 The finished arch.
The inside shape for the oven is made from damp sand (we used bricks as well to save sand). This is covered with newspaper and dampened.

 The sand former for the inside of the oven.
 Sand former covered with wet newspaper.
 The first core of the oven wall is built around the sand former. The mix is two-and-a-half parts sand to one of clay, packed down to make a four inch thick wall.
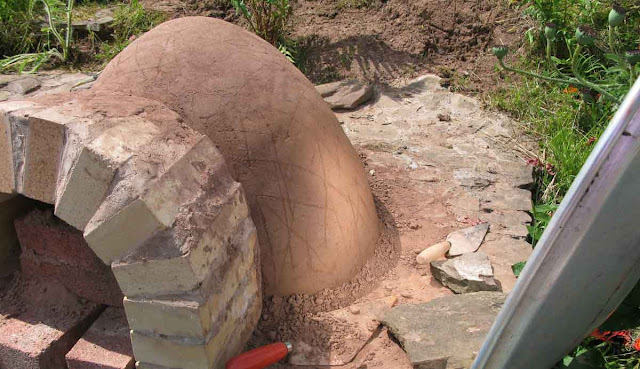 Using our old patio lamp reflector to aim the sun to dry the dark side.

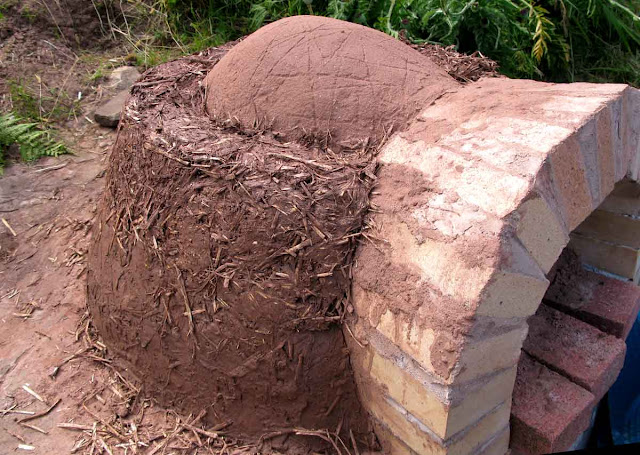 When the clay and sand layer is pretty much dry, an insulation layer is built around it of straw mixed with sufficient clay to bond it; again four inches thick.
 The mix for the insulation layer.
 The sand and bricks are removed from inside the oven.
 First fires to help drying out.
 No chimney needed - draught goes in through the bottom, smoke comes out at the top. According to the book, this works because of the relative proportions of the oven and doorway.
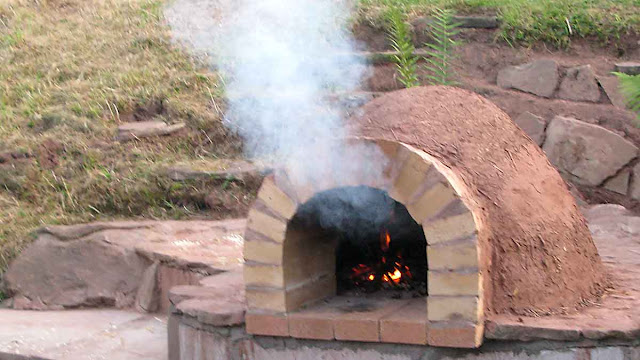
 Full fire burning to fully heat oven.
 A temporary 'peel', as the flat wooden spade is called that is used to insert the dough and bring out the pizzas or bread, made here from two planks of cladding stapled together.
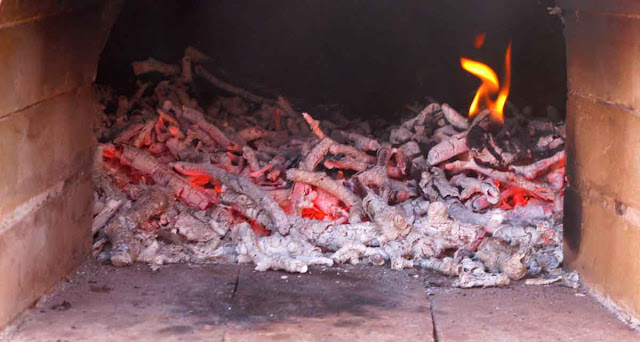
 Cinders pushed to back and first pizza cooking.
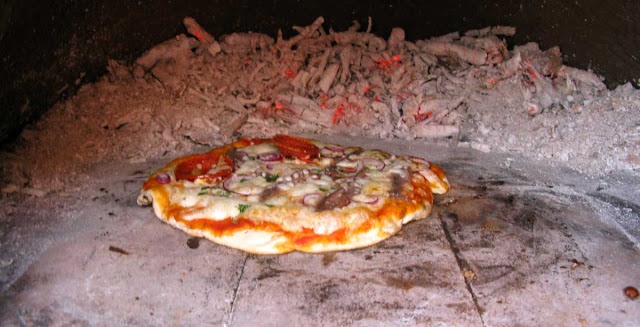
 Three minutes later.
 Soda bread, baked for 20 minutes with cinders scraped out and with door in place.
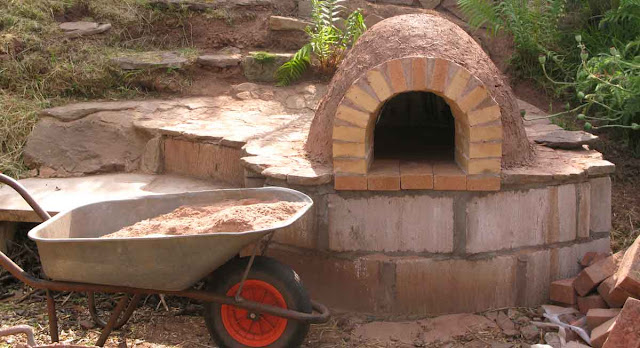
We have more work to do to fully finish the oven. We have lime and sand here waiting for good weather so that we can apply a layer of finishing plaster. We need to use lime, because, like the clay, it breathes. Even then, though, the oven will not stand up to the English rain, so we have to make a cover, a roof, for it. Also, the breeze blocks at the front are to be clad with local stone. Waiting for sunshine.
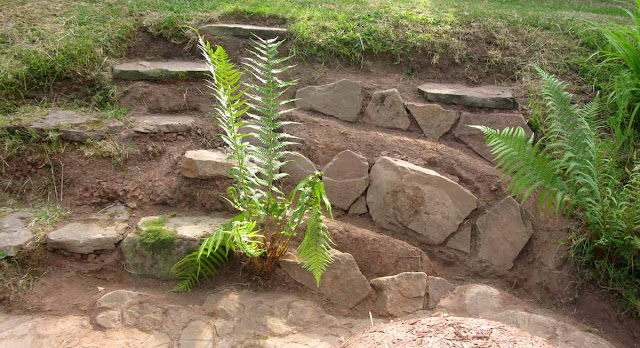
We also have to finish the rockery behind the oven. It has been shaped to carry the water away from the oven and is to be planted with herbs, oregano in particular.
 I had a lovely experience on the first day of lighting fires in the oven to help dry it out. In the evening, I lay on my belly over the clay of the oven with my arms round it and my cheek pressed against it, and felt the lovely motherly earth warmth and smell along with the scent of the straw in the clay. This straw smell brought back memories of pet guinea pigs and rabbits, and of days spent playing in barns with country cousins as a child. I didn't want to get up, so lovely was the feeling, and I lay like that for a long time, staring sideways at the late evening sky with a fir tree silhouetted against it.
Making an earth oven. Part 1
Making an earth oven. Part 3
See all Parts.


The inside shape for the oven is made from damp sand (we used bricks as well to save sand). This is covered with newspaper and dampened.


We have more work to do to fully finish the oven. We have lime and sand here waiting for good weather so that we can apply a layer of finishing plaster. We need to use lime, because, like the clay, it breathes. Even then, though, the oven will not stand up to the English rain, so we have to make a cover, a roof, for it. Also, the breeze blocks at the front are to be clad with local stone. Waiting for sunshine.
We also have to finish the rockery behind the oven. It has been shaped to carry the water away from the oven and is to be planted with herbs, oregano in particular.

Making an earth oven. Part 1
Making an earth oven. Part 3
See all Parts.
Subscribe to:
Posts (Atom)